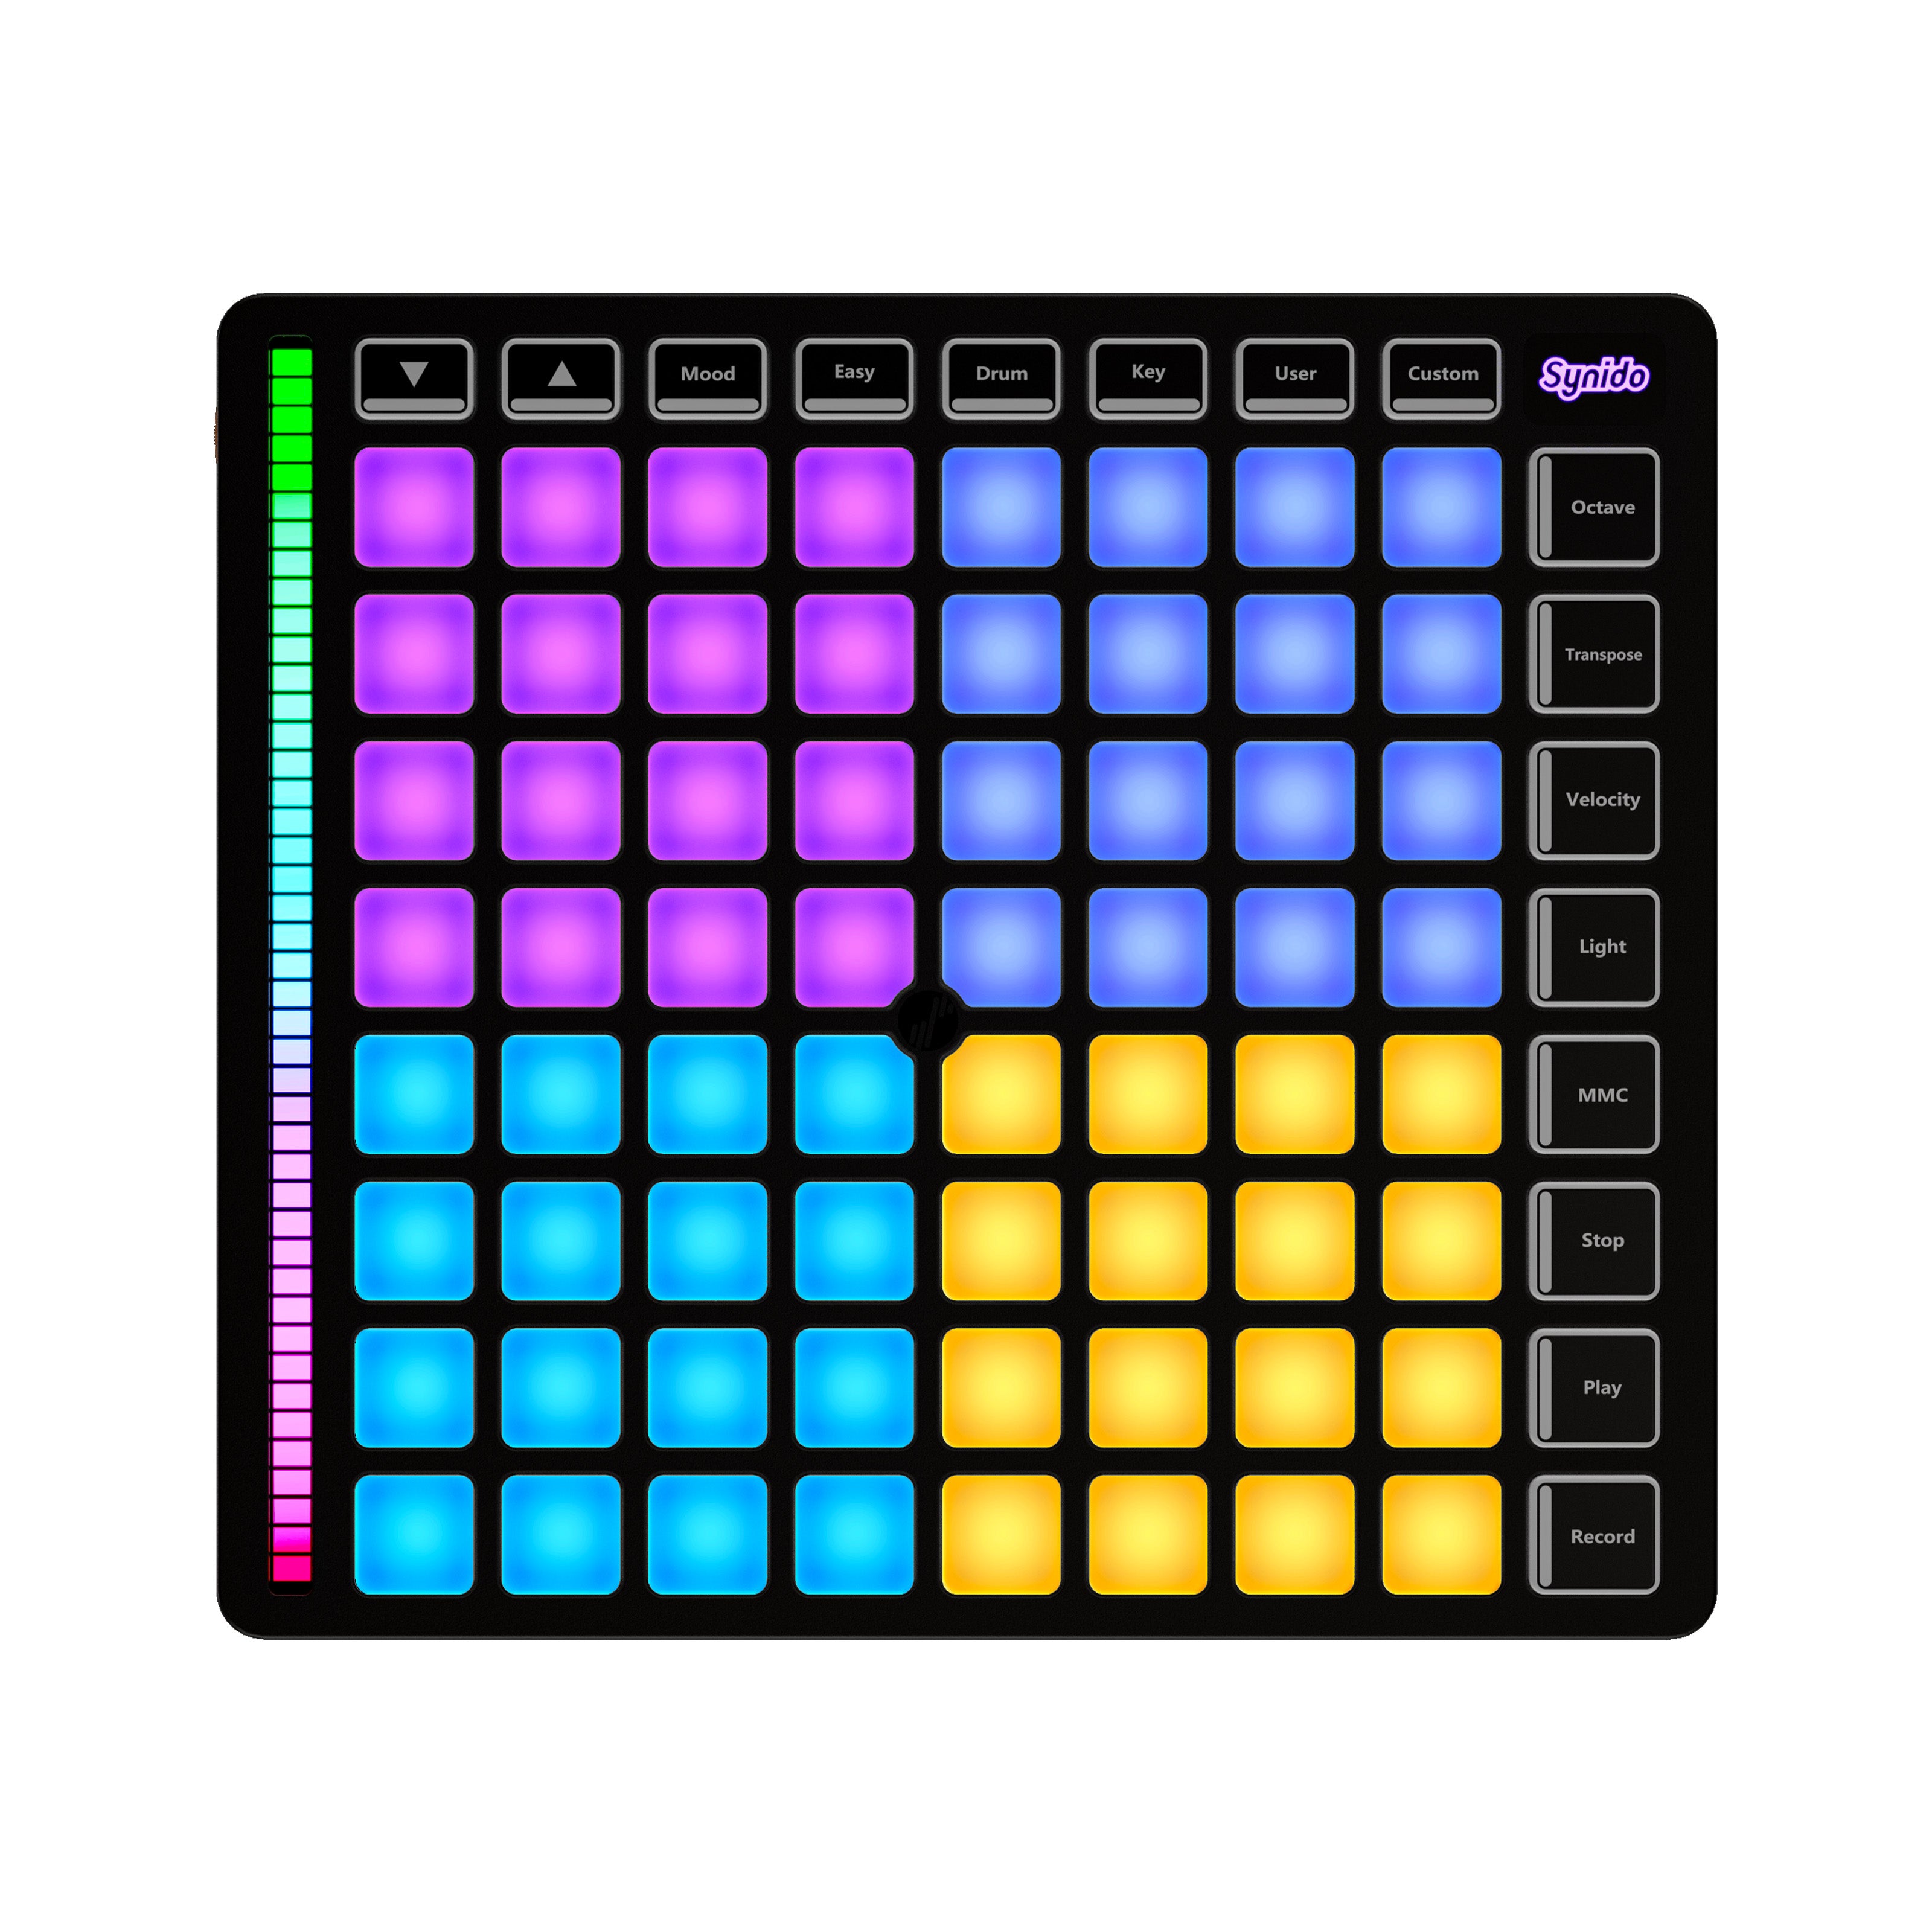
Synido TempoPAD Z-1 FAQs
Find the product using solutions here
If you have any other questions, you can contact us to get technical support help from our engineer
Contact email: cs@synido.com
#1 Synido TempoPAD Z-1 USB Forced Upgrade Procedure
Issue: Synido TempoPAD Z-1 USB Forced Upgrade Procedure
Analysis: If the device firmware upgrade process is interrupted due to operational errors, resulting in a failed firmware upgrade, you can perform a forced upgrade with the following steps.
STEP 1:
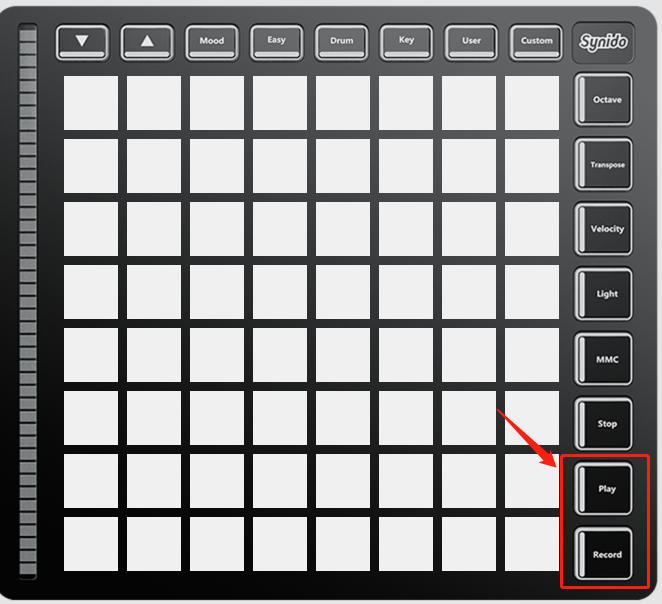
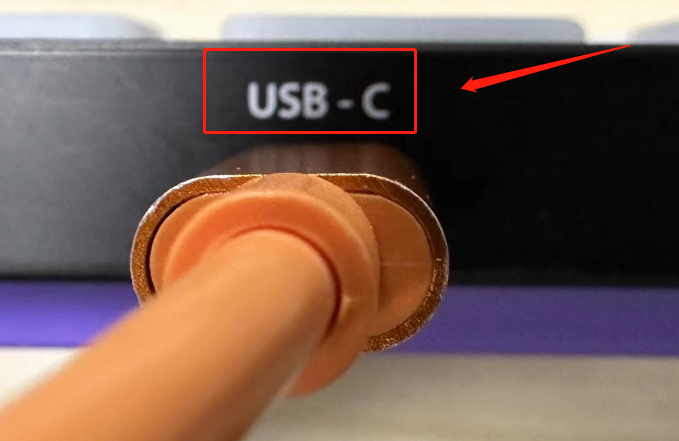
1. First, use a USB-C cable to connect one end to the computer port, then long press the "Play+Record" combination button on the device for 5 seconds (this will trigger the forced upgrade). While holding down the buttons, use the USB-C cable to connect to the device's USB-C port. After 5 seconds, release the buttons, as shown in Figure 1 as below.
STEP 2:
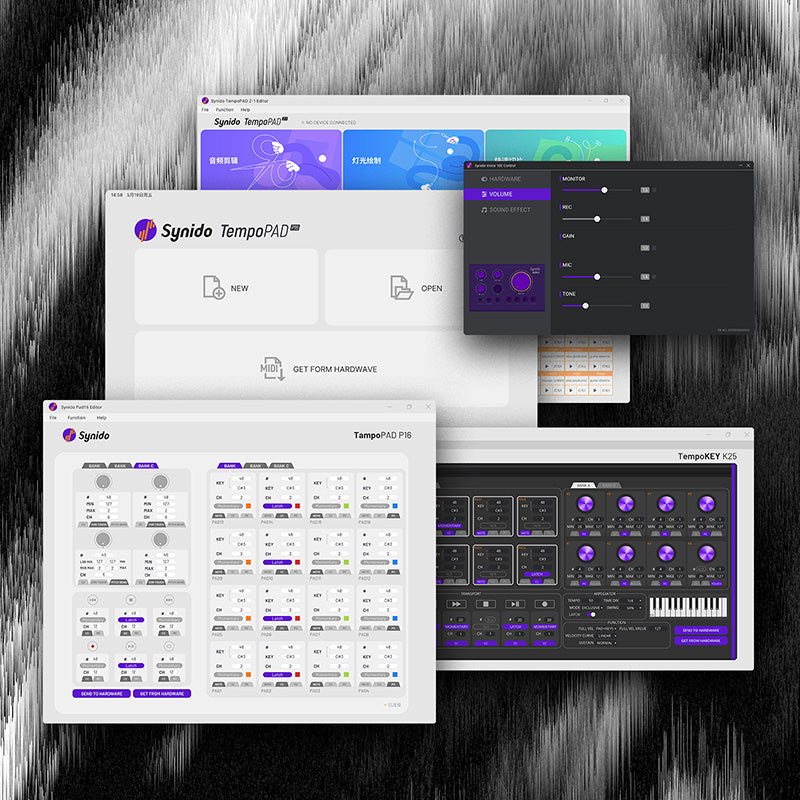
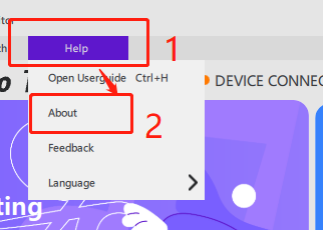
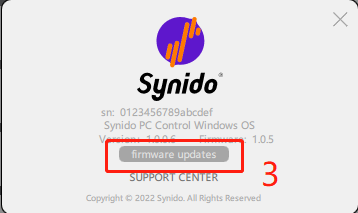
2.1 Open the "Synido TempoPAD Z-1" control panel, select Help-About in the control panel window, and in the pop-up window, select "Firmware updates" and click "Firmware upgrade" to perform the firmware upgrade, as shown in Figure 2 as below.
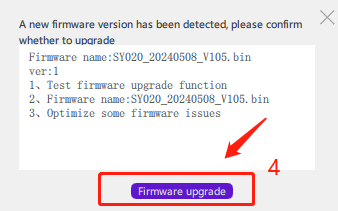
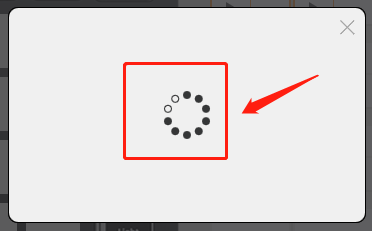
2.2 At this point, the device will enter the firmware upgrade process, and a progress spinner icon will appear.
(Note: Do not operate the device or the host computer during this time to avoid a failed firmware upgrade.)
As shown in below Figure 3:
STEP 3:
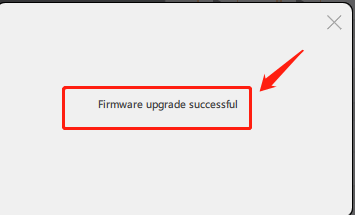
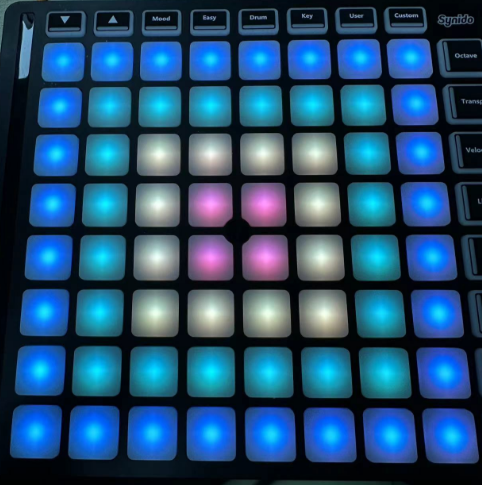
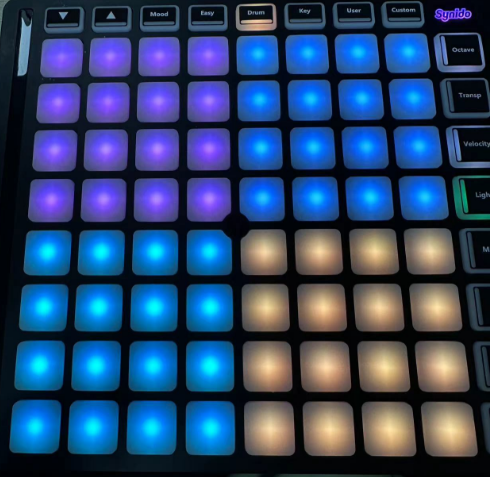
Wait for approximately 1 minute, and a "Firmware upgrade successful" message will automatically pop up. The device will display a boot animation and then enter Drum mode, indicating that the firmware upgrade was successful, as shown in Figure 4. (Note: If you wait for 2 minutes and a "Firmware upgrade failed" message appears, it means the firmware upgrade has failed or has been interrupted again due to operational errors. In this case, go back to step 1 and repeat the operation.)
#2 Synido TempoPAD Z-1 Windows Control Panel FAQ -The control panel appears to be obstructed or not fully displayed
Issue: Synido TempoPAD Z-1 Windows Control Panel FAQ -The control panel appears to be obstructed or not fully displayed
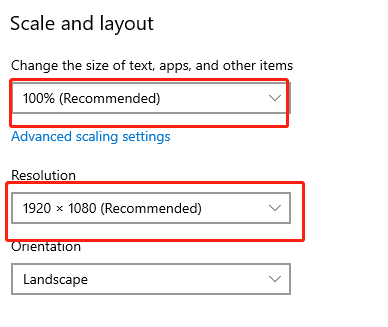
Note: It is recommended to use the Synido TempoPAD Z-1 control panel with the system display settings at 100% scaling and 1920*1080 resolution.
Analysis: If the control panel appears to be obstructed or not fully displayed, follow the steps below:
STEP 1:
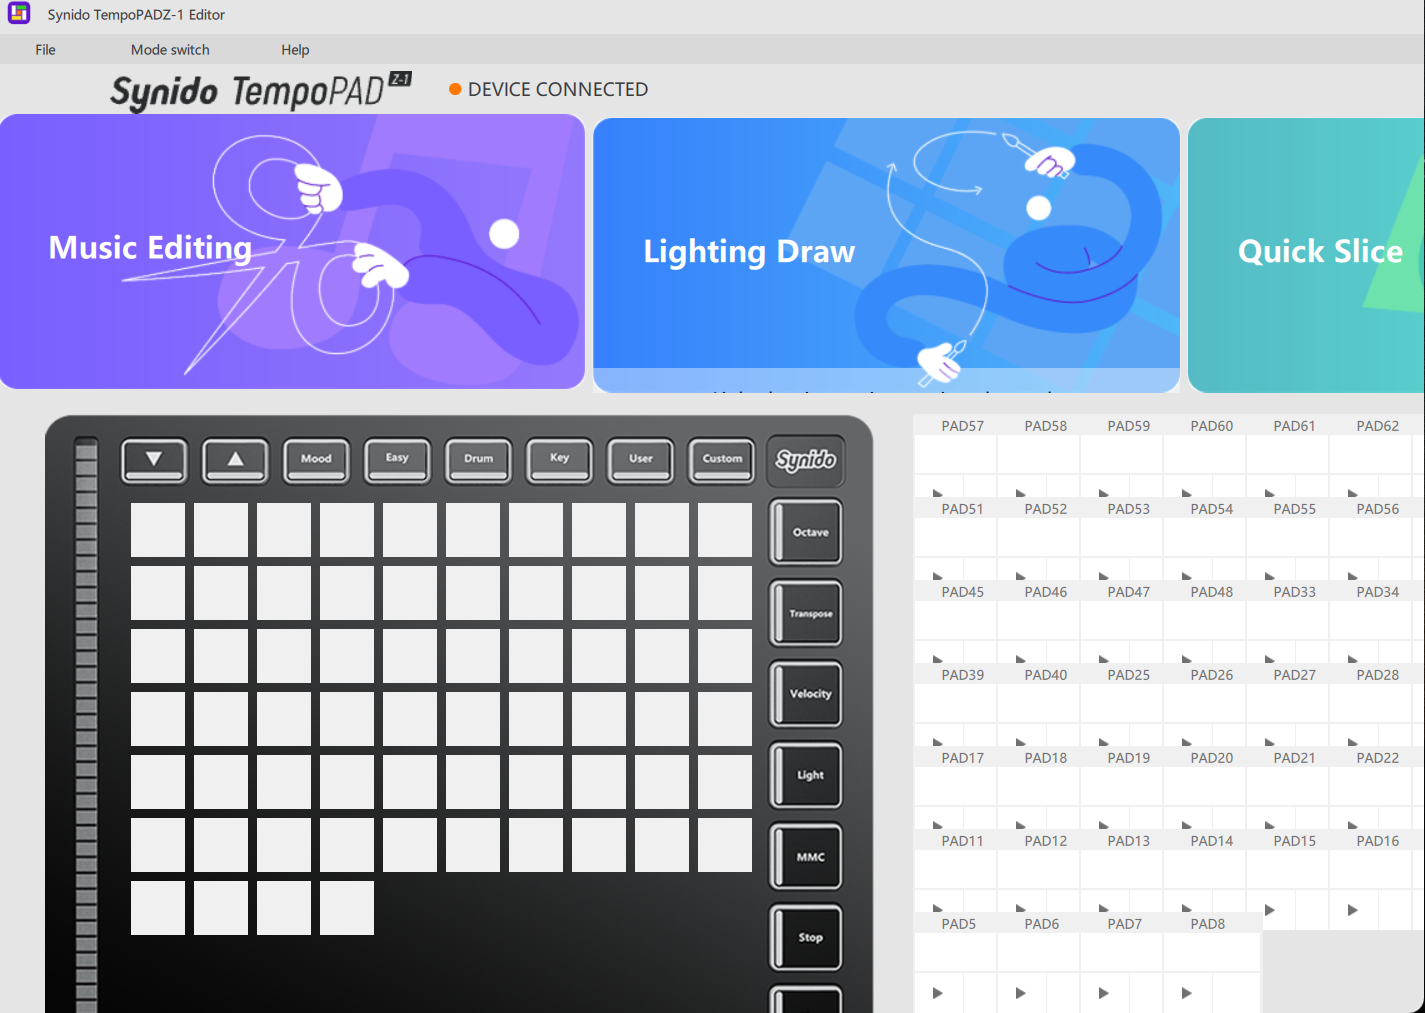
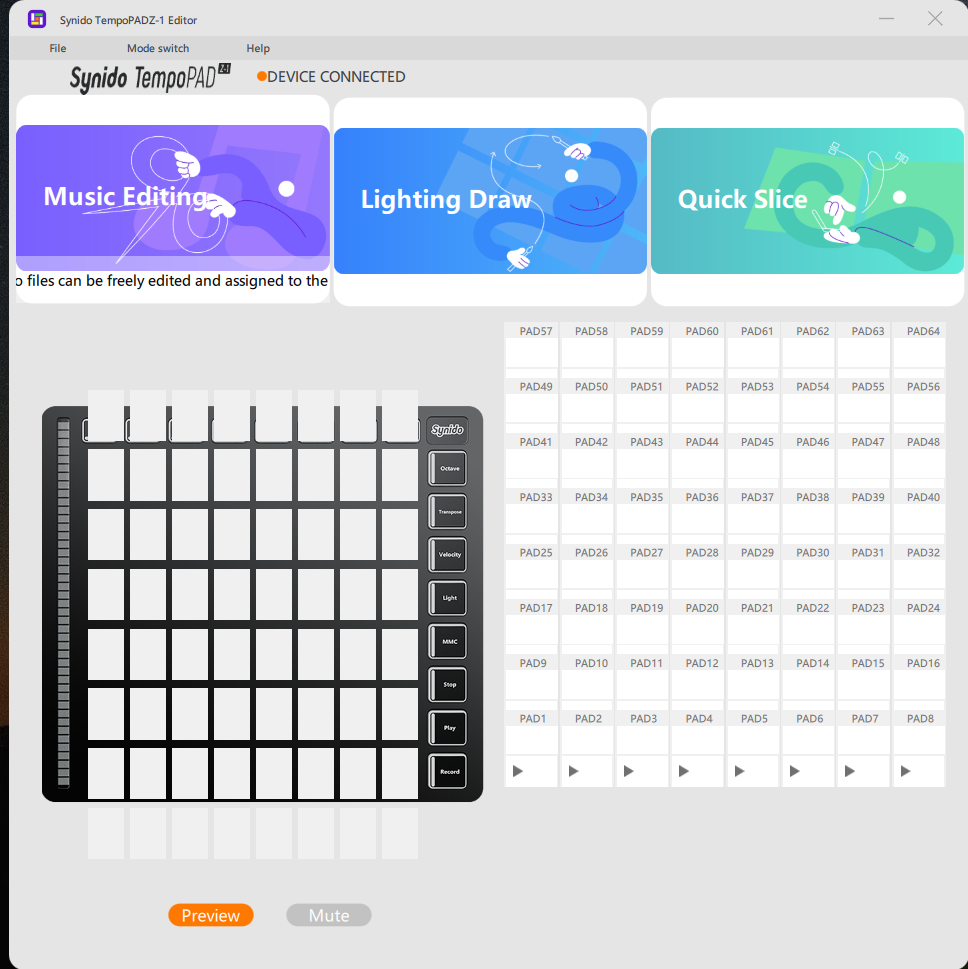
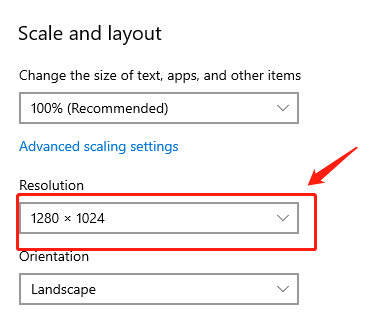
If the control panel appears to be obstructed or not fully displayed, it may be due to the incorrect scaling ratio or display resolution setting, as shown in Figure 1.
As shown in the left figure–Incorrect scaling ratio (shown in the image as 125%); As shown in the right figure – Incorrect display resolution (shown in the image as 1280*1024)
STEP 2:
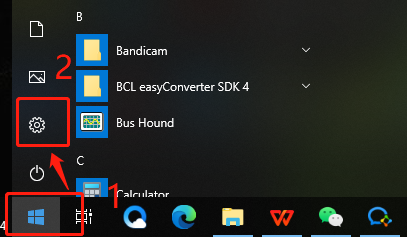
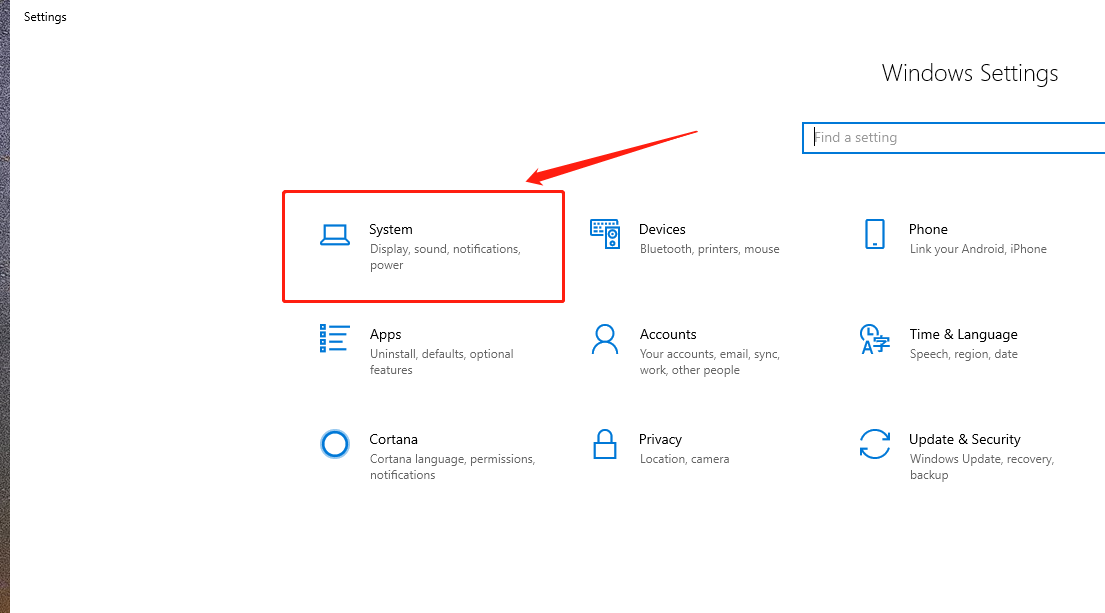
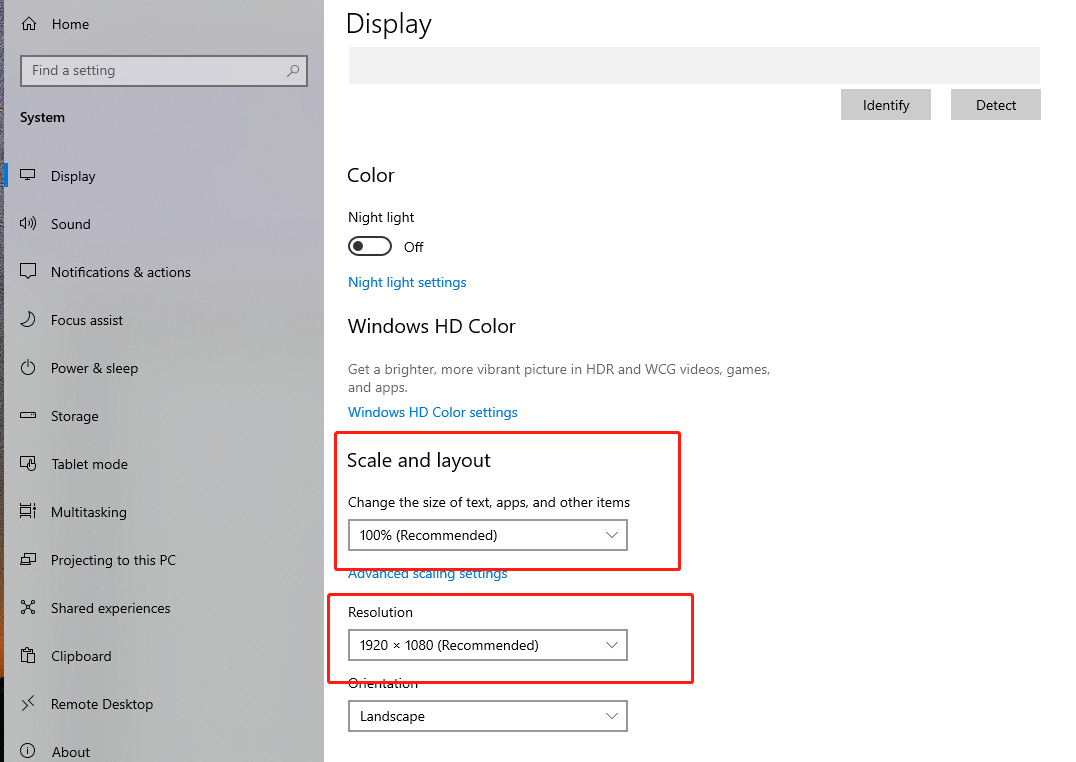
First, open the "Start" menu in the bottom left, click the "Settings" icon, enter the system settings interface, and then click the "System" icon to go to the system display interface, as shown in Figure 2.
As shown in Figure 2 below
STEP 3:
When the user encounters the following issues with the scaling ratio or display resolution settings, the corresponding operations can be performed:
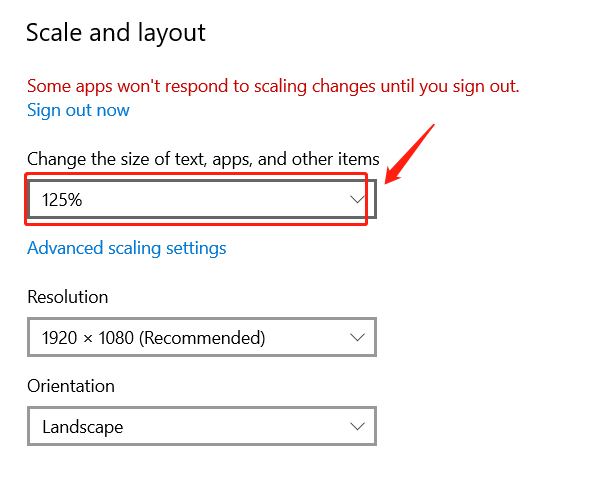
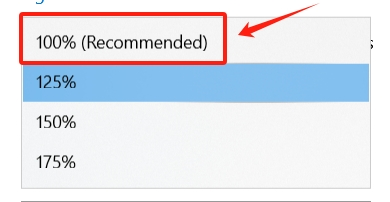
3.1: If the scaling ratio is incorrect, the steps are as follows:
For example, when the scaling ratio is set to 125%, in the second step, after entering the system display interface, select 100% in the scaling settings, and a prompt window will appear. Click the "Apply" button (if the prompt doesn't appear, you can ignore it). The system display layout will then be successfully changed to 100%, as shown in Figure 3.
3.2: If the display resolution is incorrect, the steps are as follows:
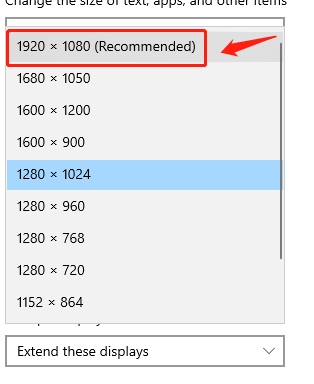
For example, when the display resolution is set to 1280*1024, in the second step, after entering the system display interface, select 1920*1080 in the resolution settings, and a prompt window
will appear. Click the "Keep changes" button, and the system display layout will then be successfully changed to 1920*1080, as shown in Figure 4 in belows.

STEP 4:
It is recommended to use the Synido TempoPAD Z-1 control panel with the system interface settings at 100% scaling and 1920*1080 resolution. If the application appears to be obstructed or not displayed correctly when opened, you can adjust the settings according to the steps above. If the issue persists, you can contact customer service for a solution, as shown in Figure 5.
#3 Can’t hear any sound when playing the drum pad in my DAW software
Solution:
1. Check if both the control panel software and the DAW software are open. When using the DAW software, close the drum pad control panel software to avoid conflicts.
2. Check if the audio output channel is selected correctly in the DAW software.
#4 Why is there no sound when I hit the drum pad?
Solution:
MIDI drum pad itself does not produce sound. It only sends MIDI signals. You need to connect it to a computer with DAW software or a phone/tablet to use it. The sound comes from the speakers of the computer or phone/tablet.
More Questions
If you have any further questions or concerns, please do not hesitate to reach out to cs@synido.com for assistance.
